Google released the final version of Android 11 this month to the public. Only select devices have received the update at the time of writing, but it is only a matter of time before additional devices may be upgraded to the new Android version.
Android 11 includes a number of new features. We reviewed some of the changes to the application permissions system already that may remove requested permissions automatically if an application is not used for a long time. Users may now also allow one-time permissions in permission prompts for select permissions.
Another new feature is native screen recording. The feature is quite hidden by default and chance is high that most Android users may overlook it. It is a basic screen recorder to capture video, with or without audio, on the device automatically. You may use it to create demo videos, record applications, web browsing, or any other activity on the device.
First thing you need to do is make sure that the device uses Android 11 as its backbone. Open Settings > About Phone to get the Android version displayed to you. Note that how that is done may differ depending on the phone's manufacturer; this tutorial is based on a Google Pixel 3a device.

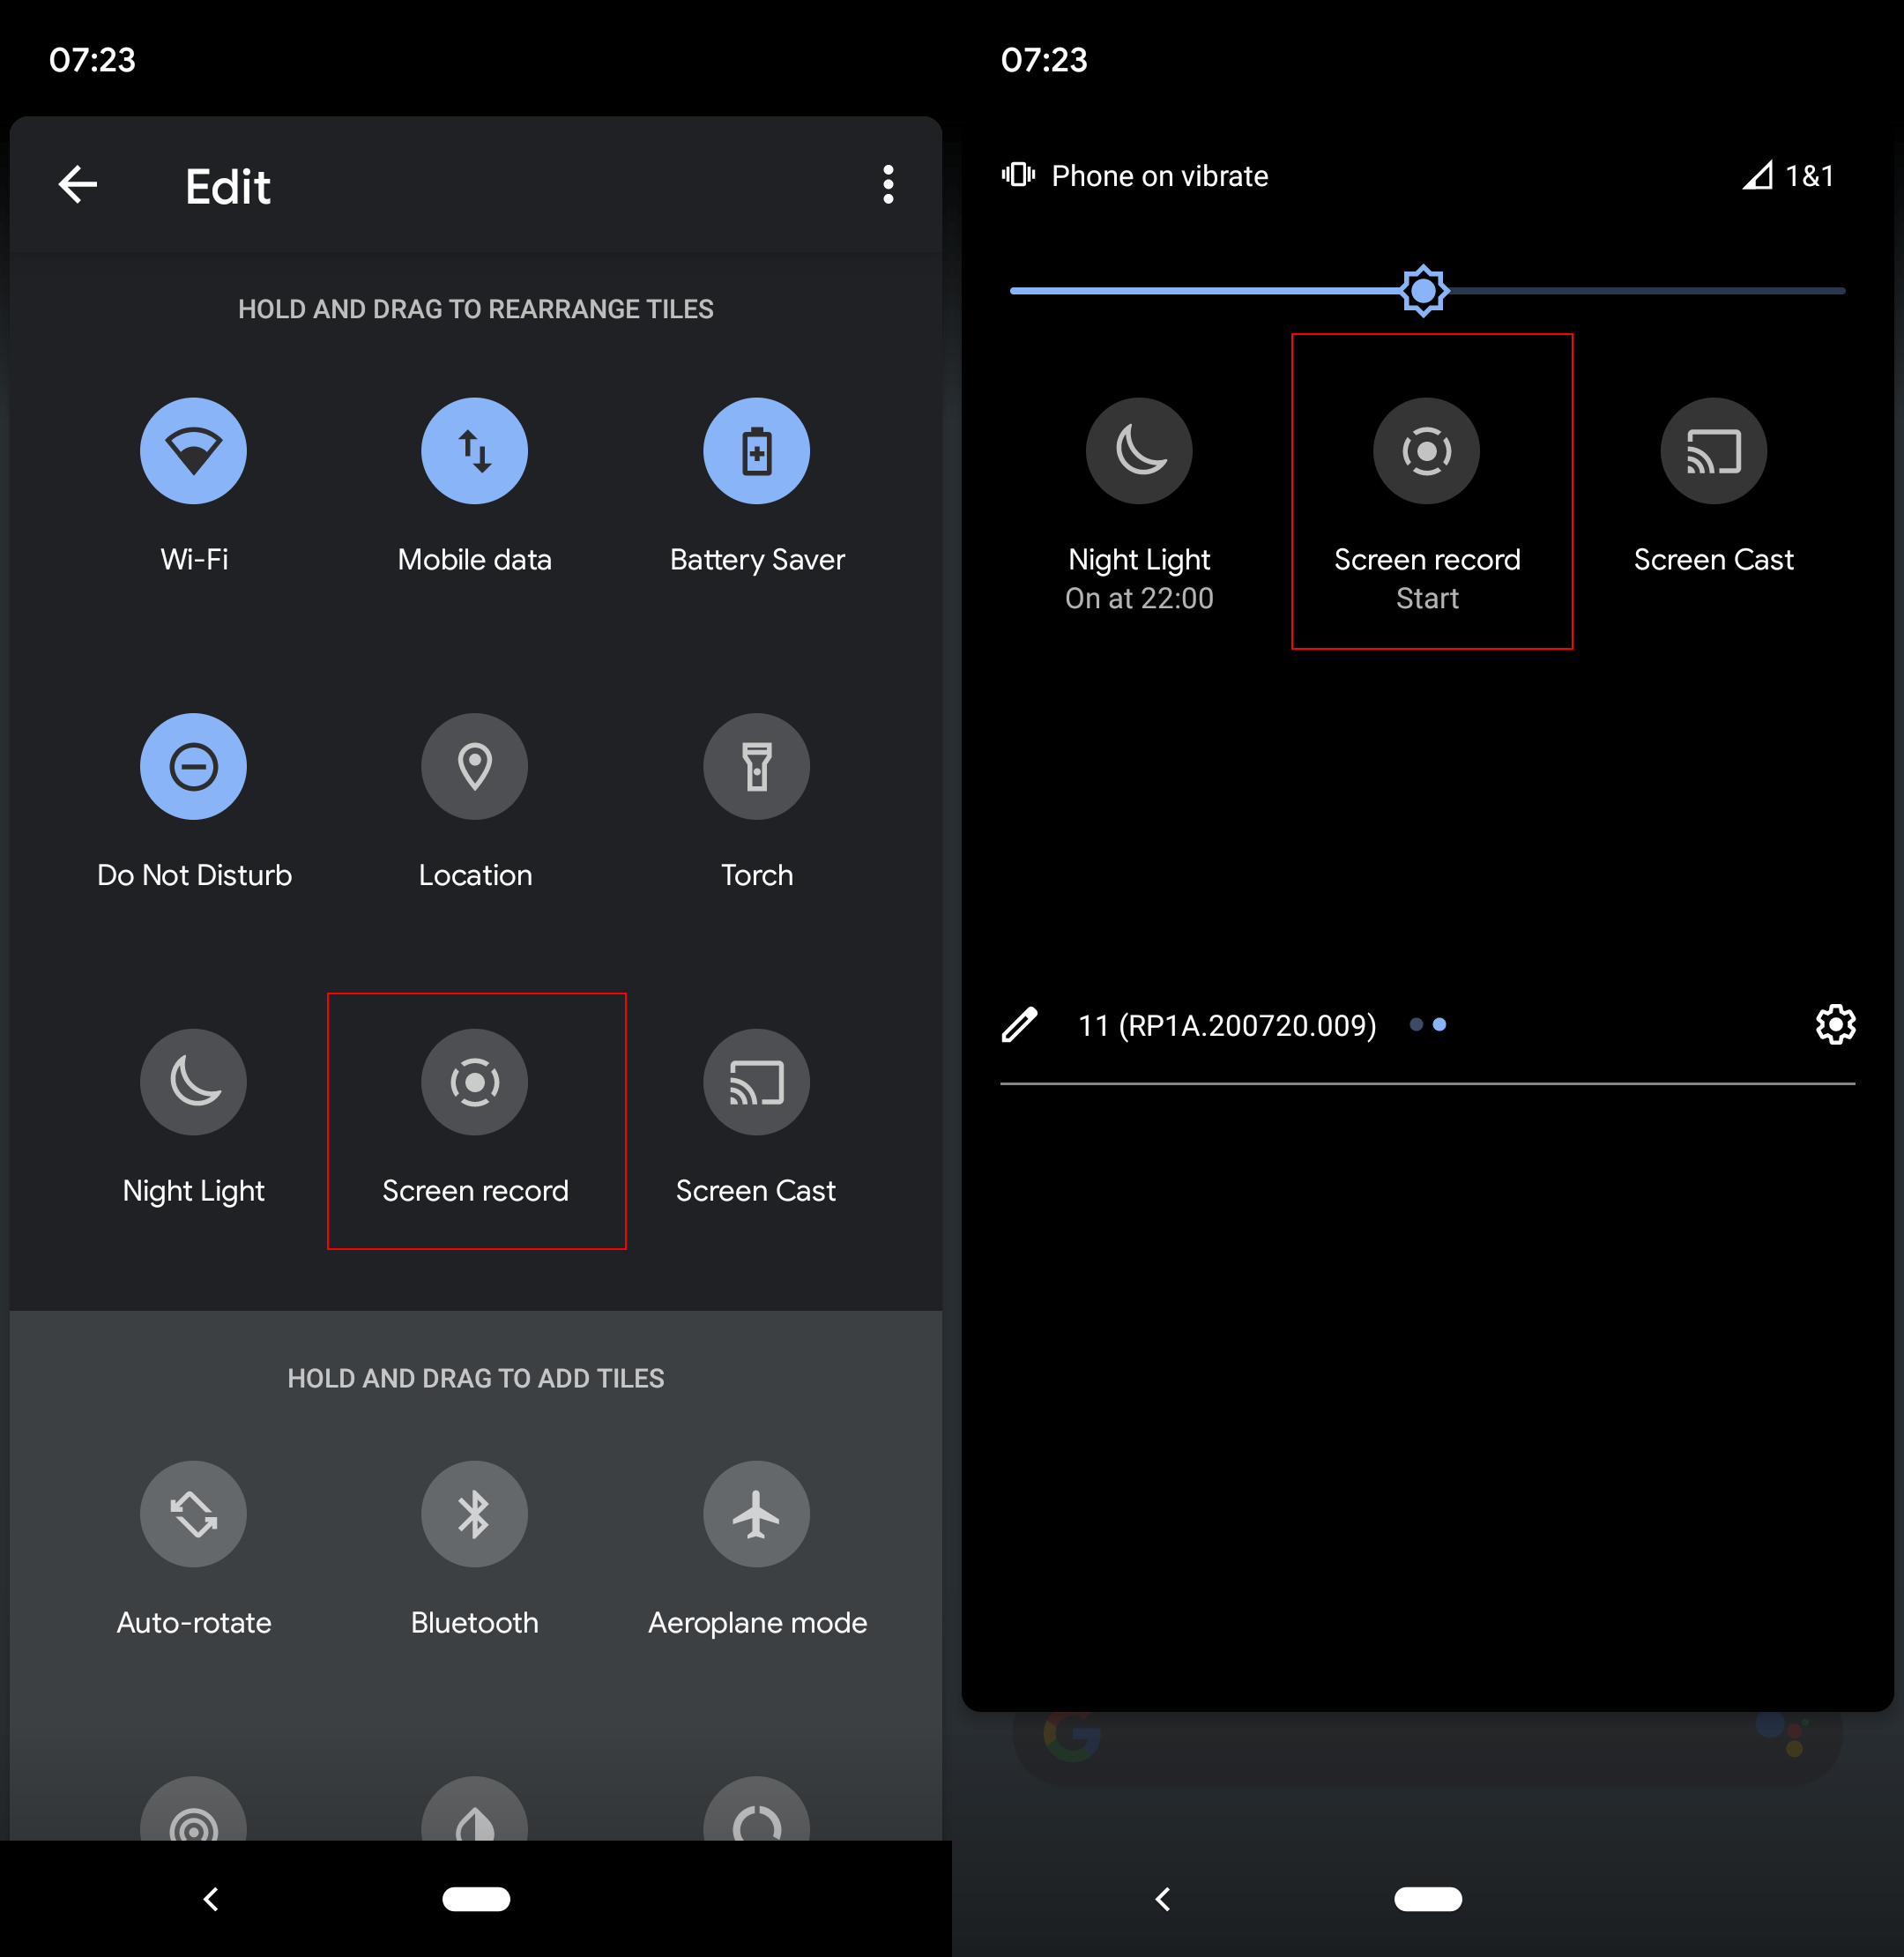
Go back to the start screen of the device afterwards and swipe down twice to display the quick toggles interface. Tap on the edit button there to open the configuration screen for these toggles.
Scroll down until you see the Screen Record tile. Tap and hold the icon and drag & drop it to the top so that it becomes available when you swipe down to bring up the quick toggles.

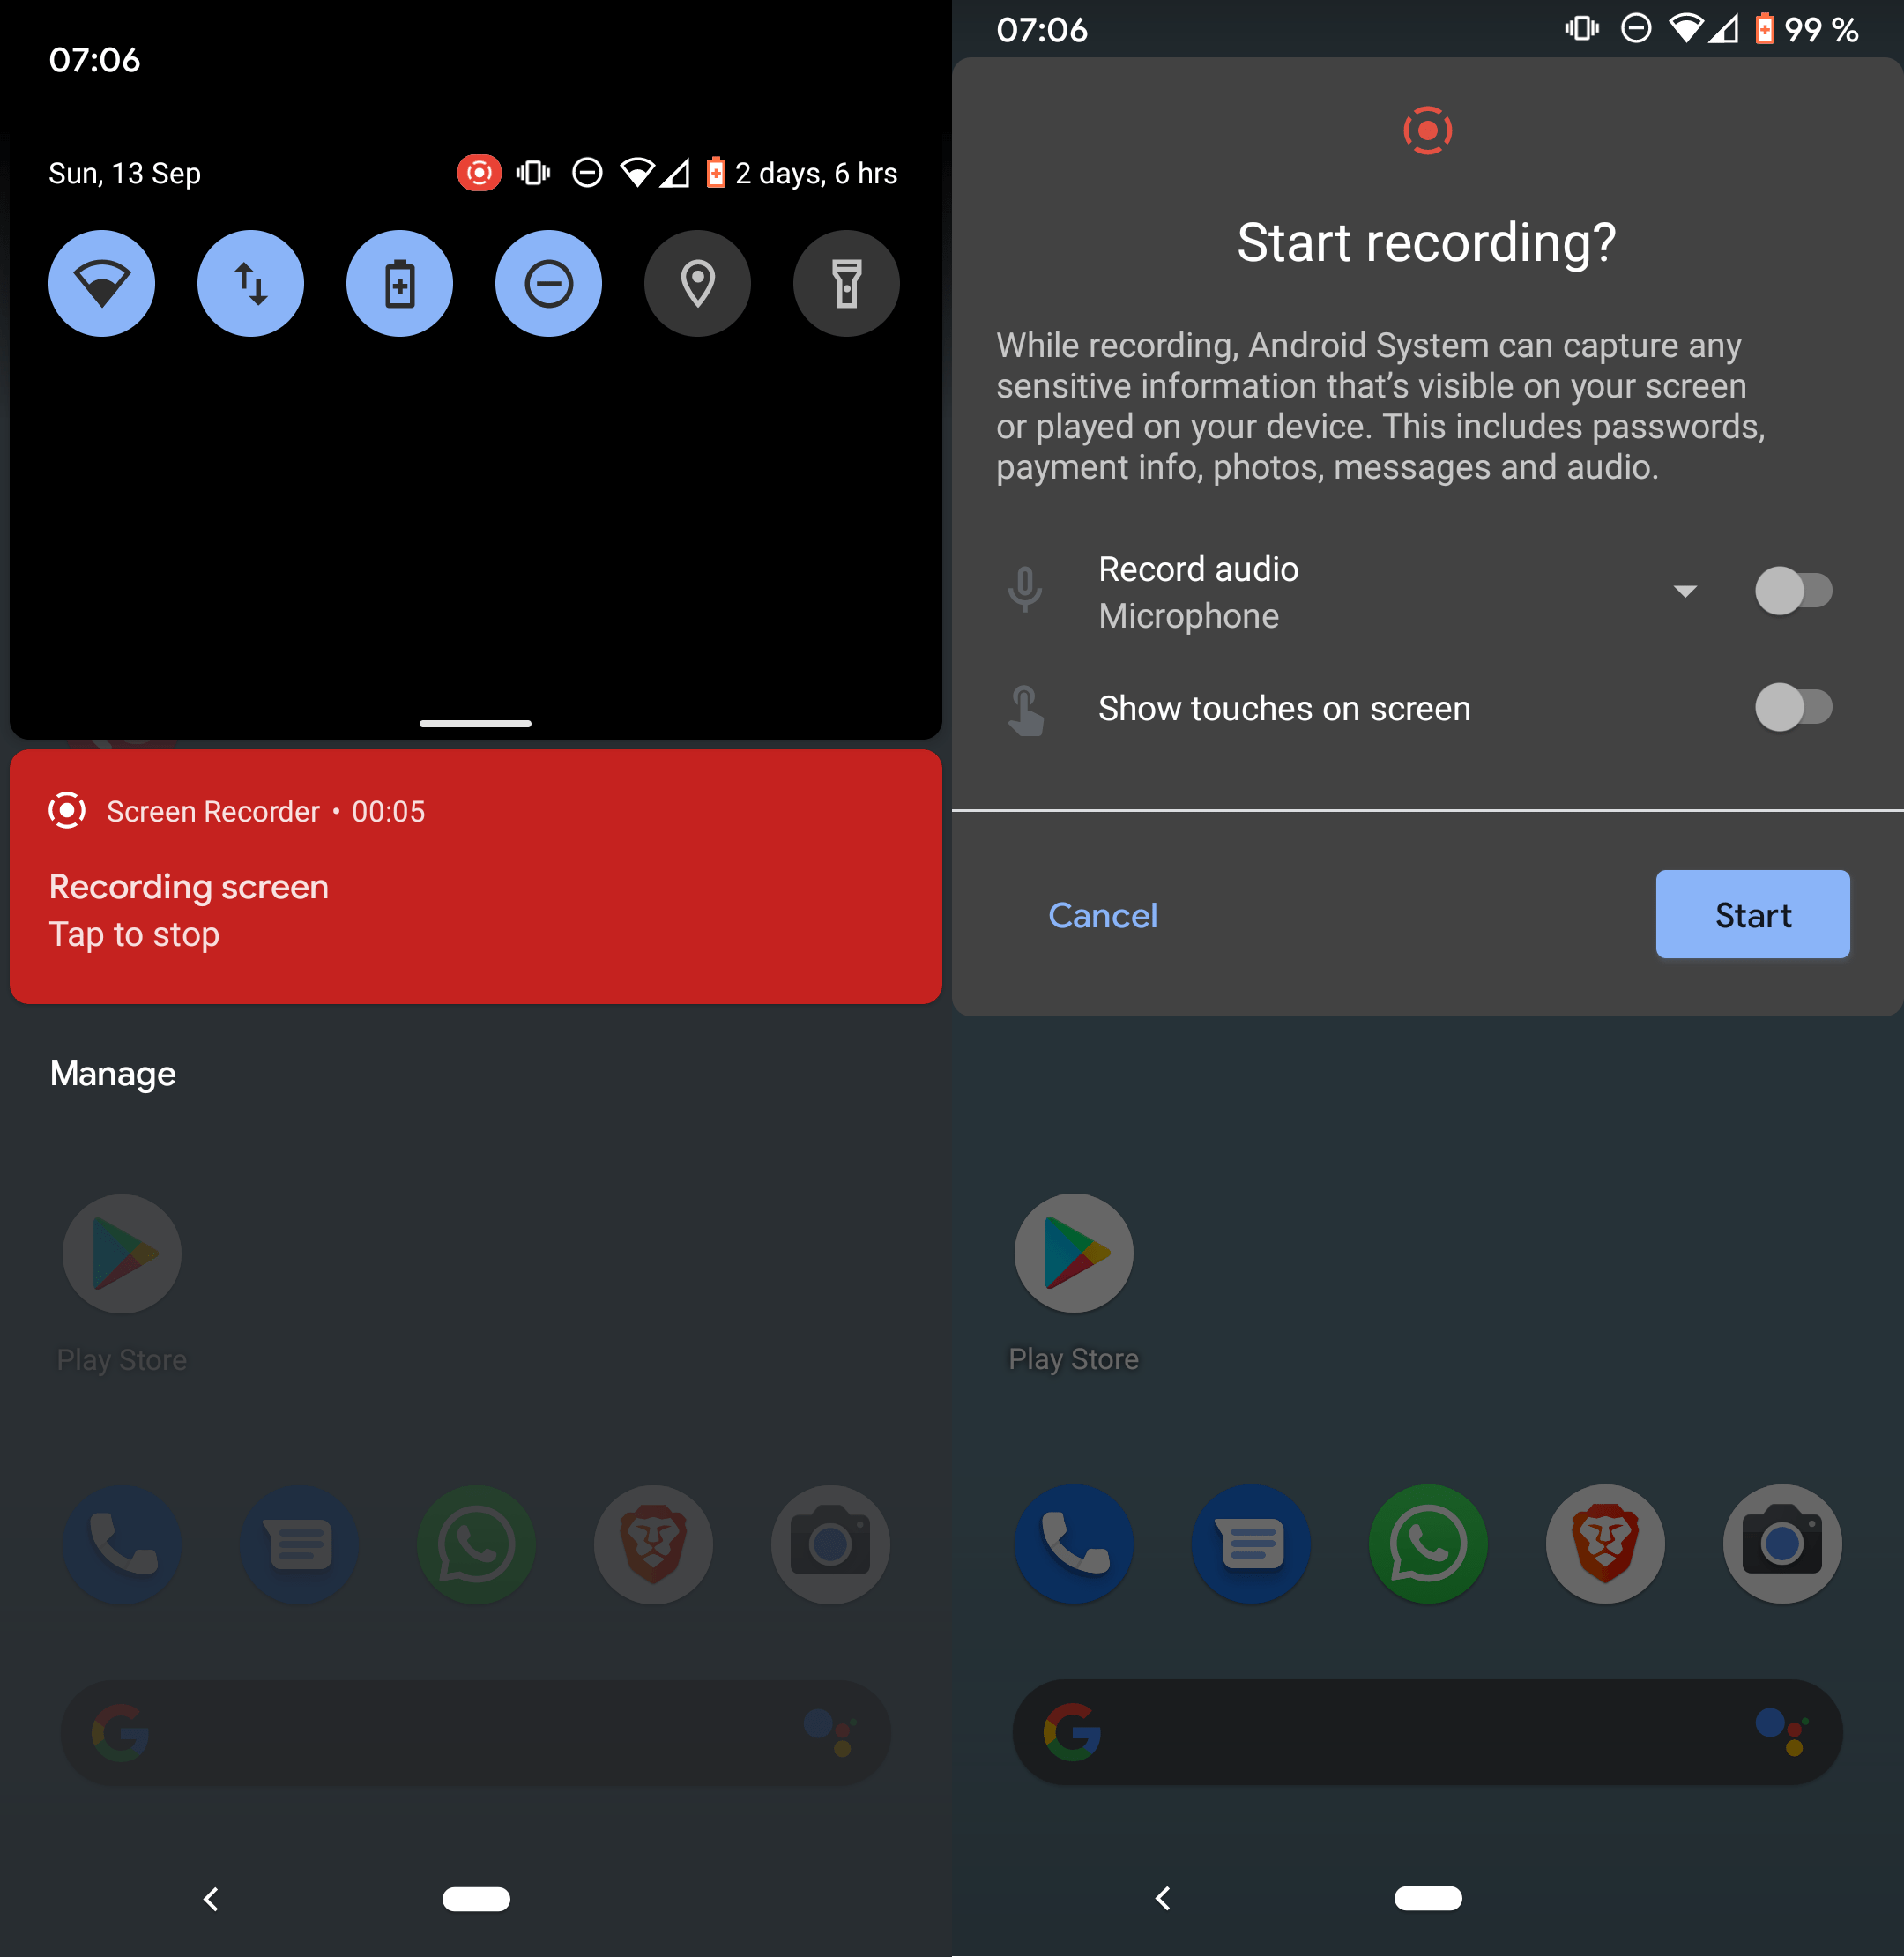
When you want to record the screen, simply swipe down and tap on Screen Record to get started. The recording does not start right away; two options are displayed instead:
- Record audio -- Option to record audio using the device's microphone, device audio (sound from the device, e.g. from an app), or both.
- Show touches on screen -- Whether the recording should include your interactions with the screen.
Hit the Start button to start the recording. You get a three-second grace period before the recording starts. You can now use the device, e.g. open applications, play a game, or browse the settings, and all that activity is recorded to the device's storage. Swipe down and tap on the recording notification to stop the recording on the device.
Closing Words
The new screen recording functionality is not as sophisticated as dedicated screen recording applications, but it may be sufficient for basic tasks.
Now You: Do you capture screenshots or video on your devices? Which apps do you use for that?
Thank you for being a Ghacks reader. The post How to use Android 11's built-in screen recorder appeared first on gHacks Technology News.
https://ift.tt/2RivZfU
from gHacks Technology News https://ift.tt/3mglqbx


No comments:
Post a Comment