Synthetic benchmarks are never a good way to determine how well your computer (or a component) is performing. All they do is run a series of preset tests, and tell you how the device performed in those.
But honestly, what do these numbers mean anyway? The higher the number the better it is usually, but the results aren't exactly easy for most users to understand. Use such tools to analyze if everything is working as intended. As long as your system is performing fine, don't worry about the results if they are lower than what you were expecting.
Tip: check out other disk-based benchmarks such as Parkdale, AS SSD Benchmark, or Check Flash.
DiskBench avoids the synthetic approach entirely, and instead uses real-word usage for its tests. In a nutshell, it allows you to pick a file or folder, and copies it where you want it to. The program benchmarks the copying process and tells you how your drive fared.
DiskBench is portable, and the executable is about 370KB. The application has a tabbed interface. The menu bar at the top can be ignored.
Let's start with the Copy File tab. Use the "Source file" to pick the file you want to use for the test. Set the "Destination File" path, i.e. where the file will be copied to. You may choose the same drive as the source and destination, though the results for this are usually considerably higher than if you selected a different drive for the destination or the source.
The file size matters as well, especially if you're using a SSD. So, it may be a good idea to use a large file for the benchmark, probably a few GBs in size. The option that is labeled "Kill Destination File" will delete the duplicate after the benchmark has been completed, so it doesn't use up your storage space. On the other hand, if you want to take a backup of the files, uncheck the "Kill" option, so it remains in the destination folder. This way, you get to backup your files, and benchmark your drive at the same time.
You may want to close all programs that are running in the background before running the tests for best results. I didn't have the browser running during the tests, but had a couple of lightweight programs open, as I wanted to see DiskBench's resource usage, and whether it had an impact while multi-tasking. It's fairly light-weight, sort of like how File Explorer would act when copying files to and fro.
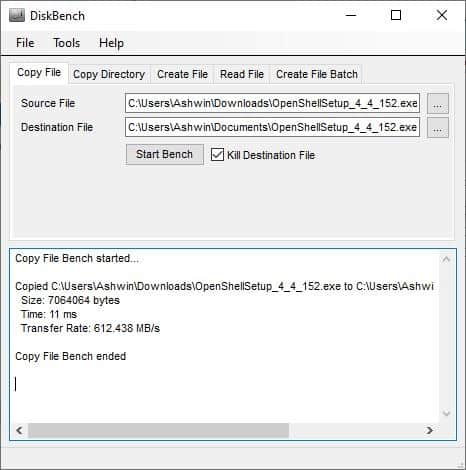
Click on the "Start Bench" button to begin the process. The pane at the bottom of DiskBench's interface displays the log of the task. Refer to it to view the source and destination path, the size of the selected file, the time taken for the file to be copied, and the transfer rate (copying speed).
Here's the first result, I used a 7MB executable for the test.
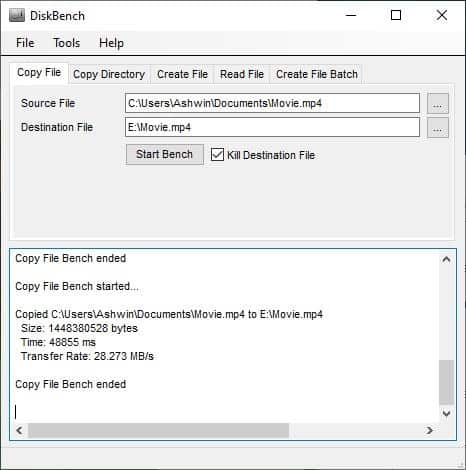
The process was completed too fast. So, here's a result from another test where I moved a 1.34GB video from my SSD to my external drive. This test took quite a while to be completed, but it gave me a more accurate idea of the write speeds of the drive.
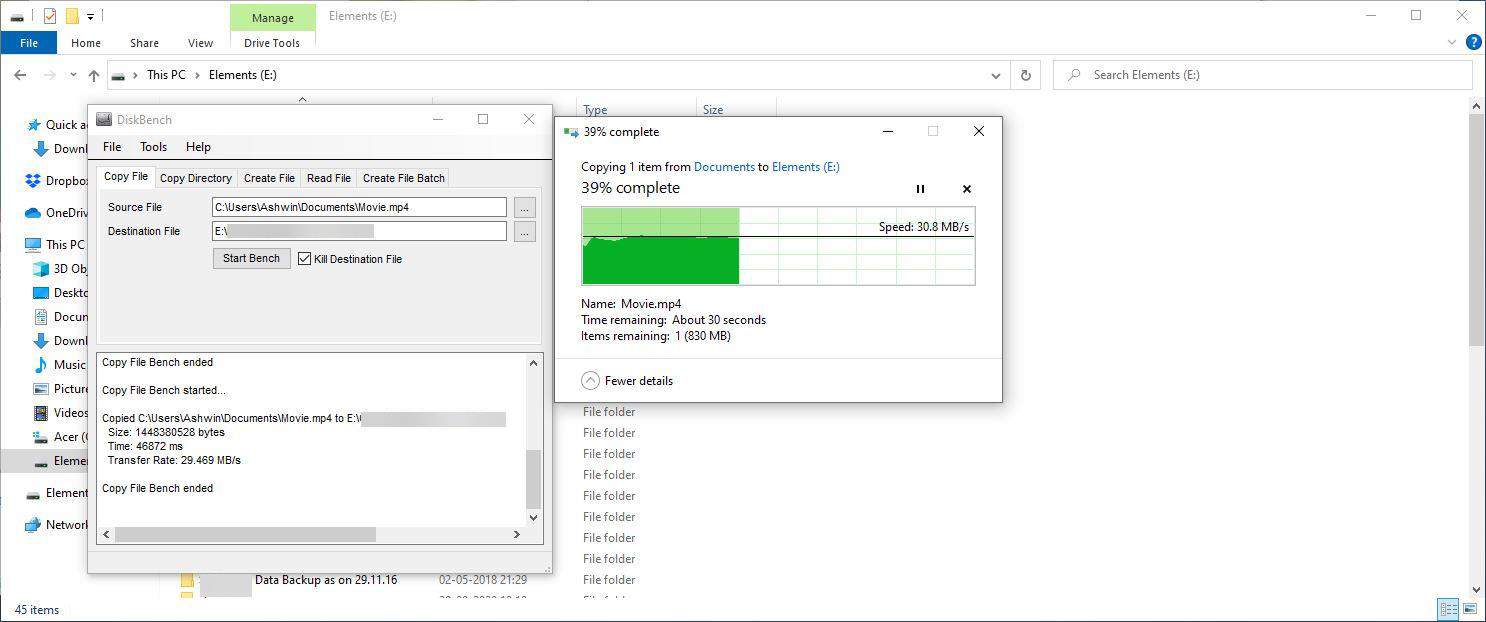
I wanted to compare the result with Explorer's copying tool. So here's a snapshot of that. It's fairly close to what DiskBench reported.
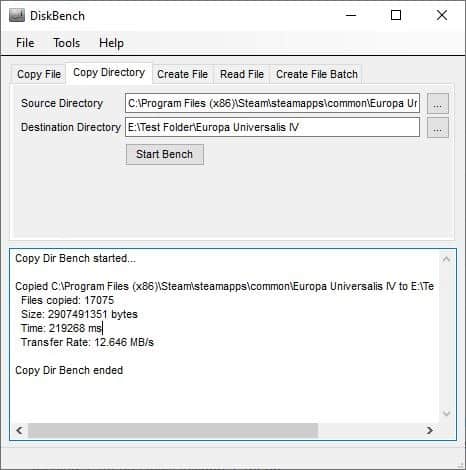
Moving on to the next tab, Copy Directory. This is basically the same as the previous option, except DiskBench will copy an entire folder. I used a game folder, since it contained a lot of files (over 17,000) and that would affect the writing speed.
Note: The program does not delete the duplicate folder that was created during the test. You'll have to do it manually.
I repeated the test with the same folder several times and got different speeds every time. Here's one of those results which showed the process took over 3 and a half minutes to complete.
When I copied the same folder using Explorer, i noticed that the speed was rising and falling. DiskBench's result probably shows the average speed taken to complete the copying process, which would explain why it was slower than what Explorer reported. It would have been nice if it showed a progress bar of the file copy process, along with the read/write speeds.
The Create File tab in DiskBench uses an algorithm to create a custom file in the location of your choice. You can enable the "create two files" option to write 2 files at the same time. The process has a couple of customization options; set the Block size (in KB, MB, GB) and the Number of Blocks.
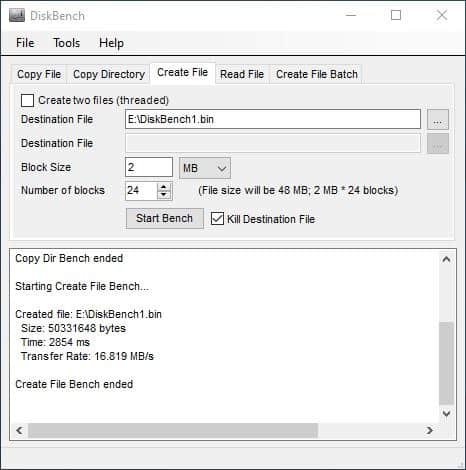
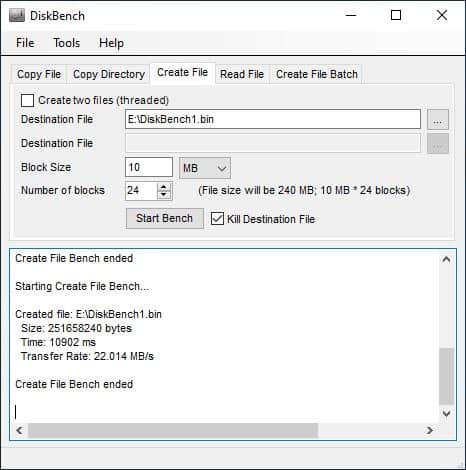
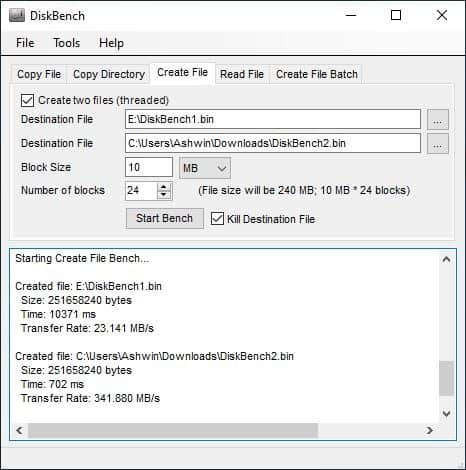
The default setting ends the process too quickly. So you may want to customize the block size. The resultant file size is displayed on the screen, so use it to set the block size accordingly. Don't choose a number that's too large or it will take forever for the test to be completed.
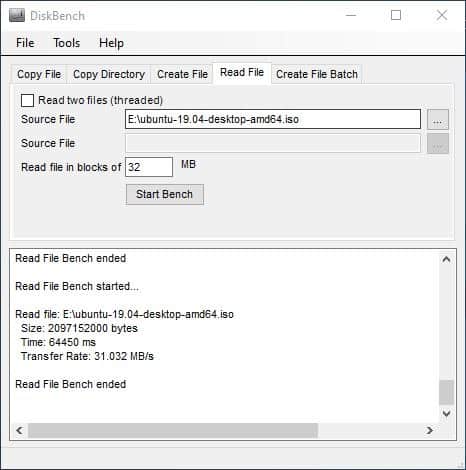
DiskBench has a Read File benchmark that allows you to select up to 2 files to be read. It has an option to set a custom value for the number of blocks the file should be read (in MB).
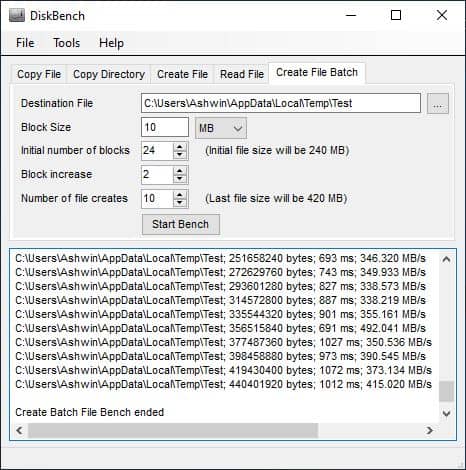
Create File Batch is similar to the process that Create File uses, except the former creates many files. Customize the settings as required and hit Start Bench. The program displays the file size, time taken to write the file, and the speed at which it was done for each file.
DiskBench also supports command line arguments, you can find the list of commands on the official website.
In my opinion, DiskBench was pretty close to the actual speeds reported by explorer. The results that it gives are quite easy to understand.

Thank you for being a Ghacks reader. The post DiskBench is a freeware tool that can benchmark your hard drive using a simple file/folder copy process appeared first on gHacks Technology News.
https://ift.tt/2RaNTB8
from gHacks Technology News https://ift.tt/3k5OOzv


No comments:
Post a Comment